Virtual fences can be set up to know when your pets leave and enter areas like your home, work, the park or anywhere you like. You can create up to 10 fences in your account, and apply different fences to different pets in your account, so you can always keep an eye on your furry escape artist!
Before enabling a fence on your pet's tracker, you need to create the fence.
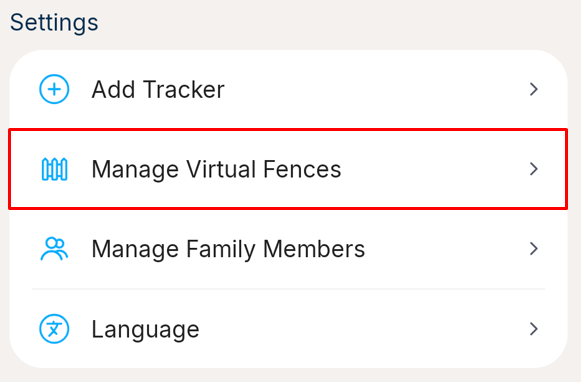
1. Go to the More tab, and select the Manage Virtual Fences under the Settings section
2. You should then see a list of Virtual Fences in your account. Click the New Virtual Fence button at the bottom of the screen. If the button is disabled, you may have 10 fences already and will need to delete one first.

3. Enter a name for the fence, of your choice, so that when you get a notification, you'll know which fence has been entered or exited.

4. Pan the map to centre the building, or area, or park, etc., that you want to monitor an area around. You can click the Map Settings icon button to switch the map to satellite mode to help you find the exact location, and you can also pan the map to your current position, using the Location Pin icon button on the map.
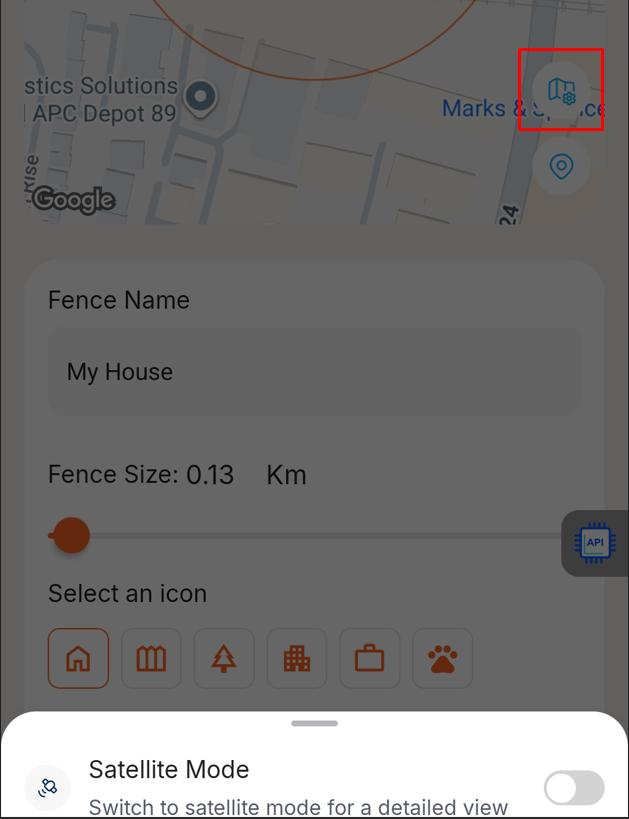
5. Use the slider at the bottom of the screen to adjust the size of the fence circle. e.g. how far from your home, other building or park do you want your pet to go before you will enter or exit.
6. Choose an icon. You will see this icon on the manage fence page to help you remember what each fence is for.
7. Press Create Virtual Fence. The next step is to apply the fence to a tracker. To do this, please follow the article: How do I enable a virtual fence for my pet?
Was this article helpful?
That’s Great!
Thank you for your feedback
Sorry! We couldn't be helpful
Thank you for your feedback
Feedback sent
We appreciate your effort and will try to fix the article